How to Import and use .DAE models from The Models Resource into Blender :3
and solving issues :3
Authored: DARIIUS
Written: 05/20/2025
Hello! I made this tutorial because I've recently been having lots of fun playing with models from The Models Resource
in Blender! Though, unforunately, I've run into a couple issues while messing around with models, many of which do not have a set answer to help
users with. Many of these issues I had to scavenege the web for answers, trying all solutions until I got things working the way I want.
I think it's a little sad there's no solid, complete helpful page on how to solve these issues, so I decided to make a quick page to help anyone who may need it!!
Just to note quickly before we jump into things! I am not an expert in Blender nor claim to be! I'm just a hobbyist who would hate to see others struggle
for answers with quick solutions :3 I really hope this helps!! Also, this tutorial was made using Blender 4.4.3, so to any future people... hi.
Importing a .DAE model into Blender
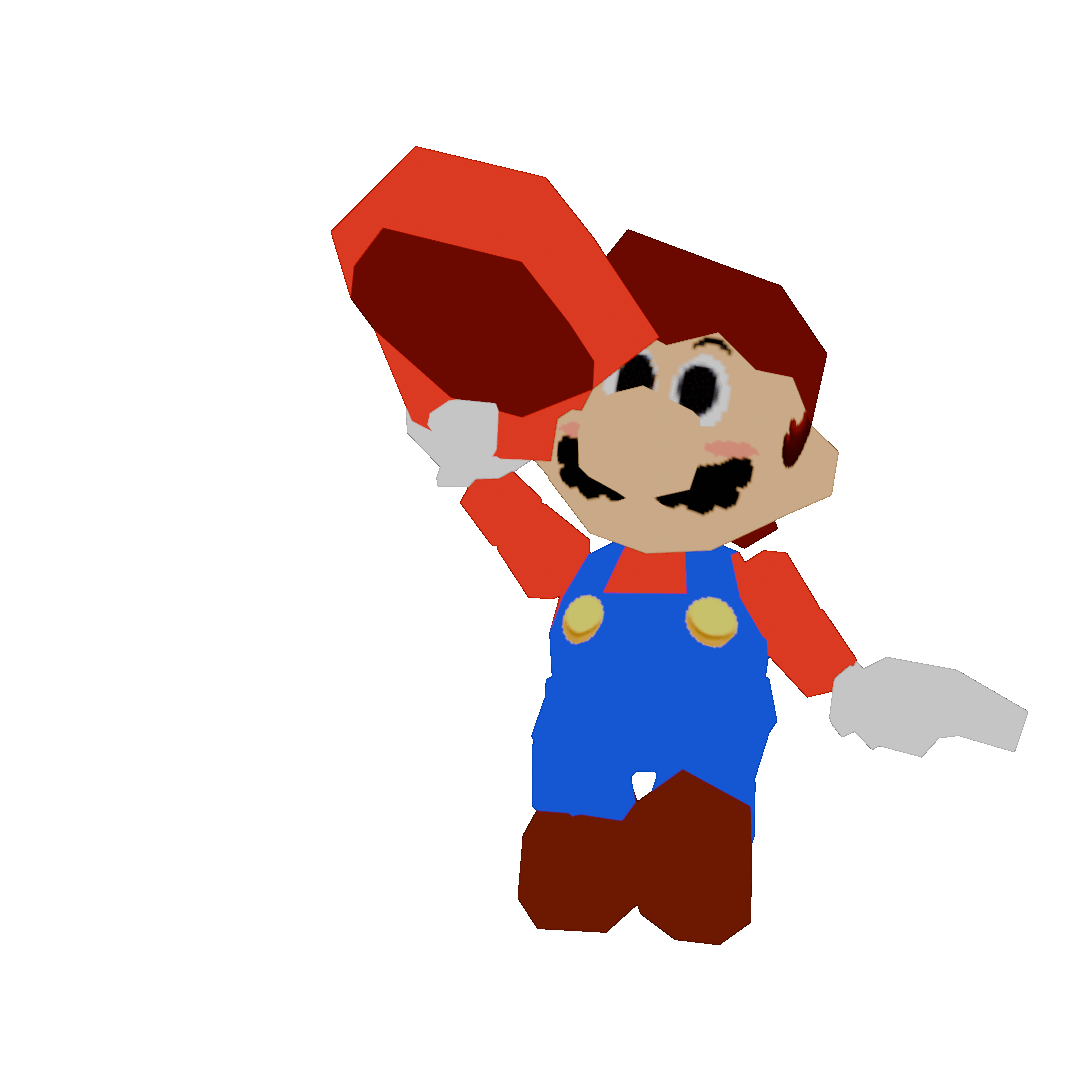
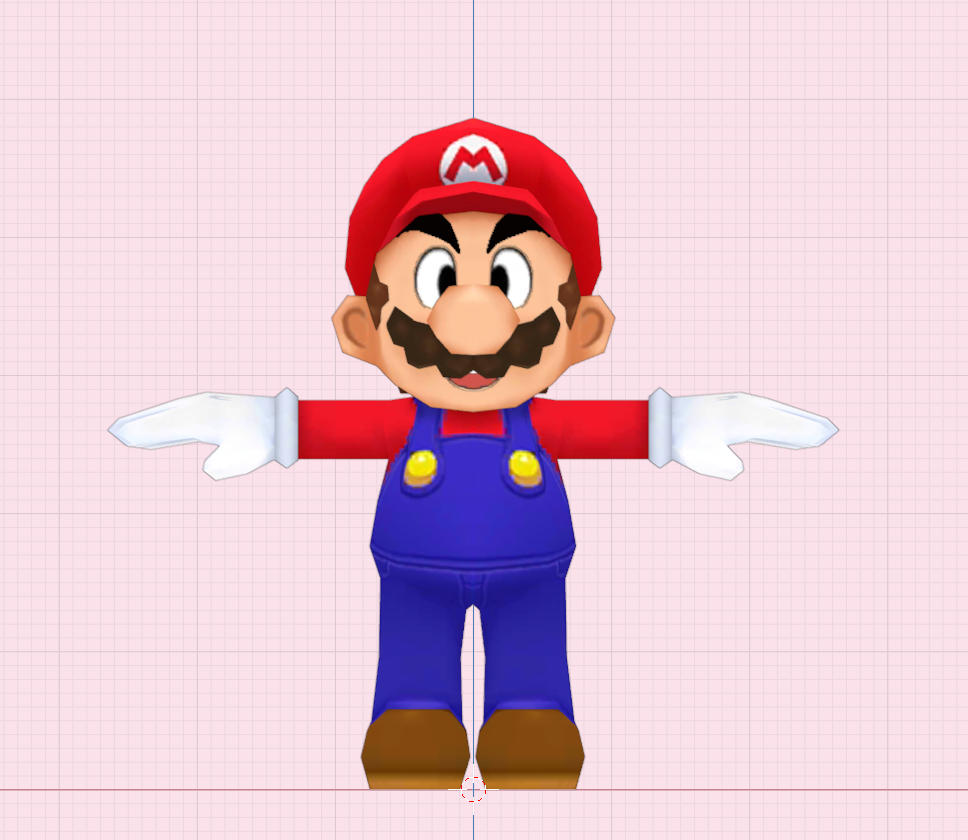
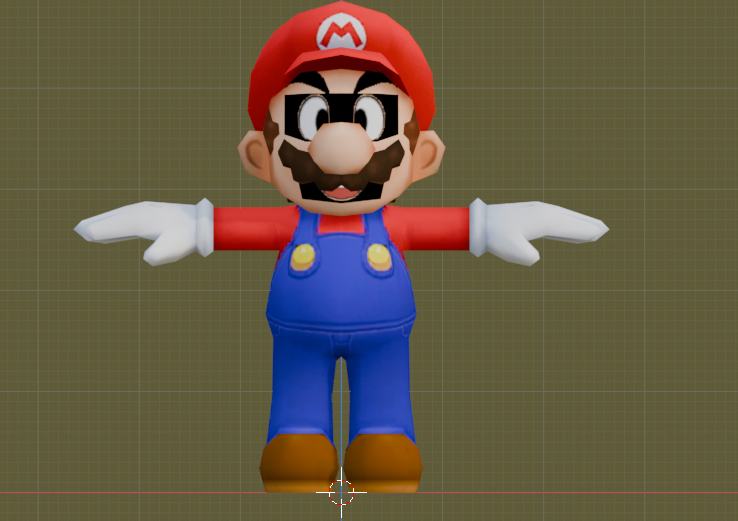
For this tutorial, I will be demonstrating with the Mario model from Mario & Luigi: Paper Jam because I love Mario!
Feel free to use whatever model you like as long as it's a DAE one! I'm not sure this tutorial will work with other model files, so I'd just suggest sticking to .DAE ones for the most benefit
from this tutorial!!
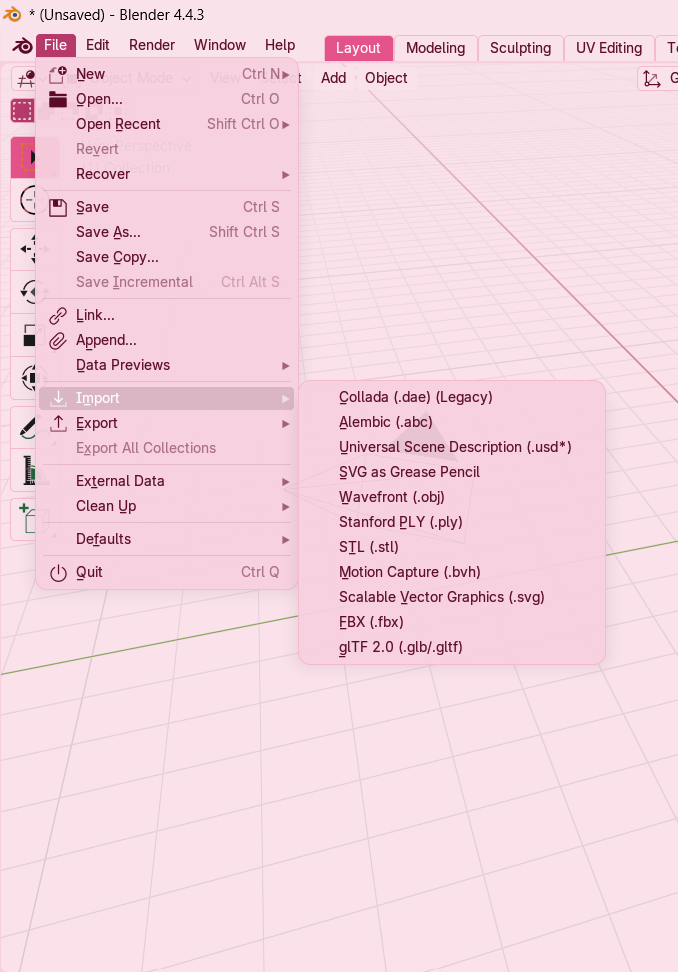
Hit 'Download this Model', then after download make sure the file is unzipped and extracted so Blender can get to it!! Now, open Blender and delete the cube. You can delete
it by selecting it and hitting either X or the Delete button. Now, locate File, then scroll down to Import, once there, choose Collada DAE (Legacy)!
Now locate the folder you just downloaded and find the model you wish to work with! If you are following this tutorial and also using the
Paper Jam Mario model, make sure to select the 'cb_cha01_mario.dae' file! Mario has a lot of different .dae models in Paper Jam, but for the sake of the
tutorial and simplicity, we will just be using his first model!
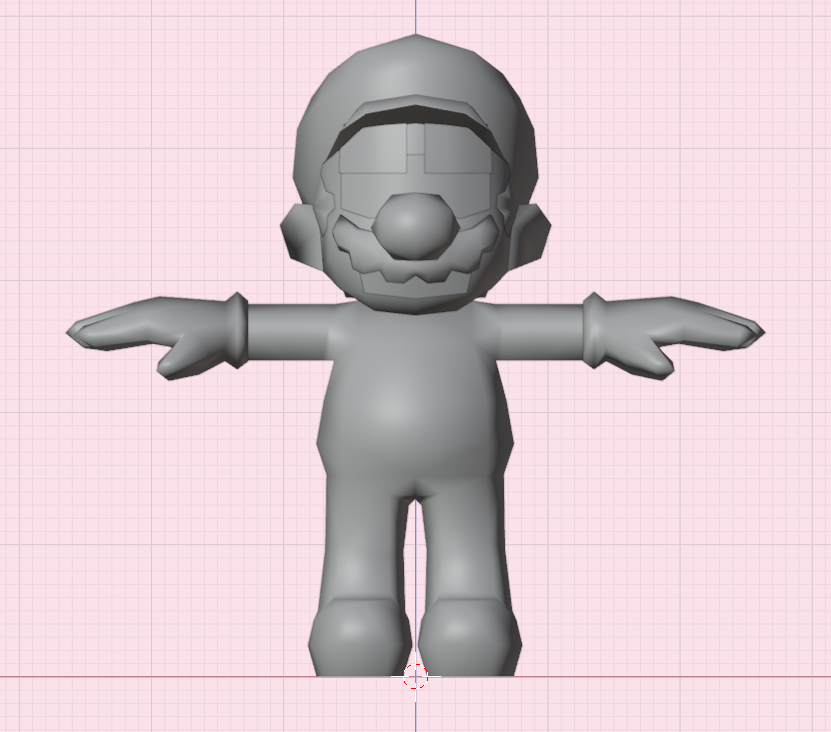
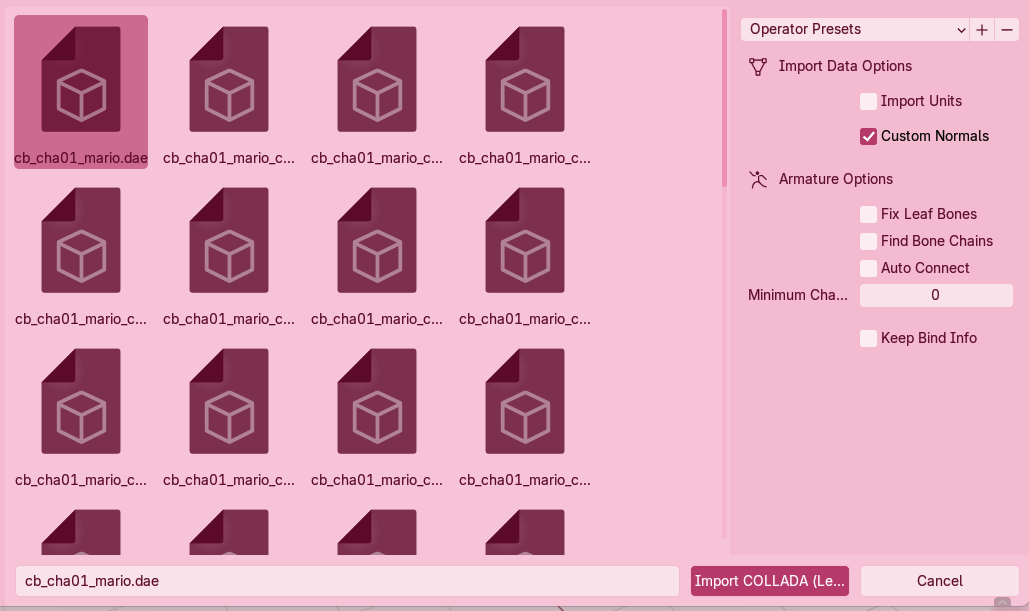 Once selected your desire model, just hit Import! Now, it's here!! My immediate suggestion right off the bat, is to please scale down the hell out of your model.
Make sure to zoom out so you can see your model fully.
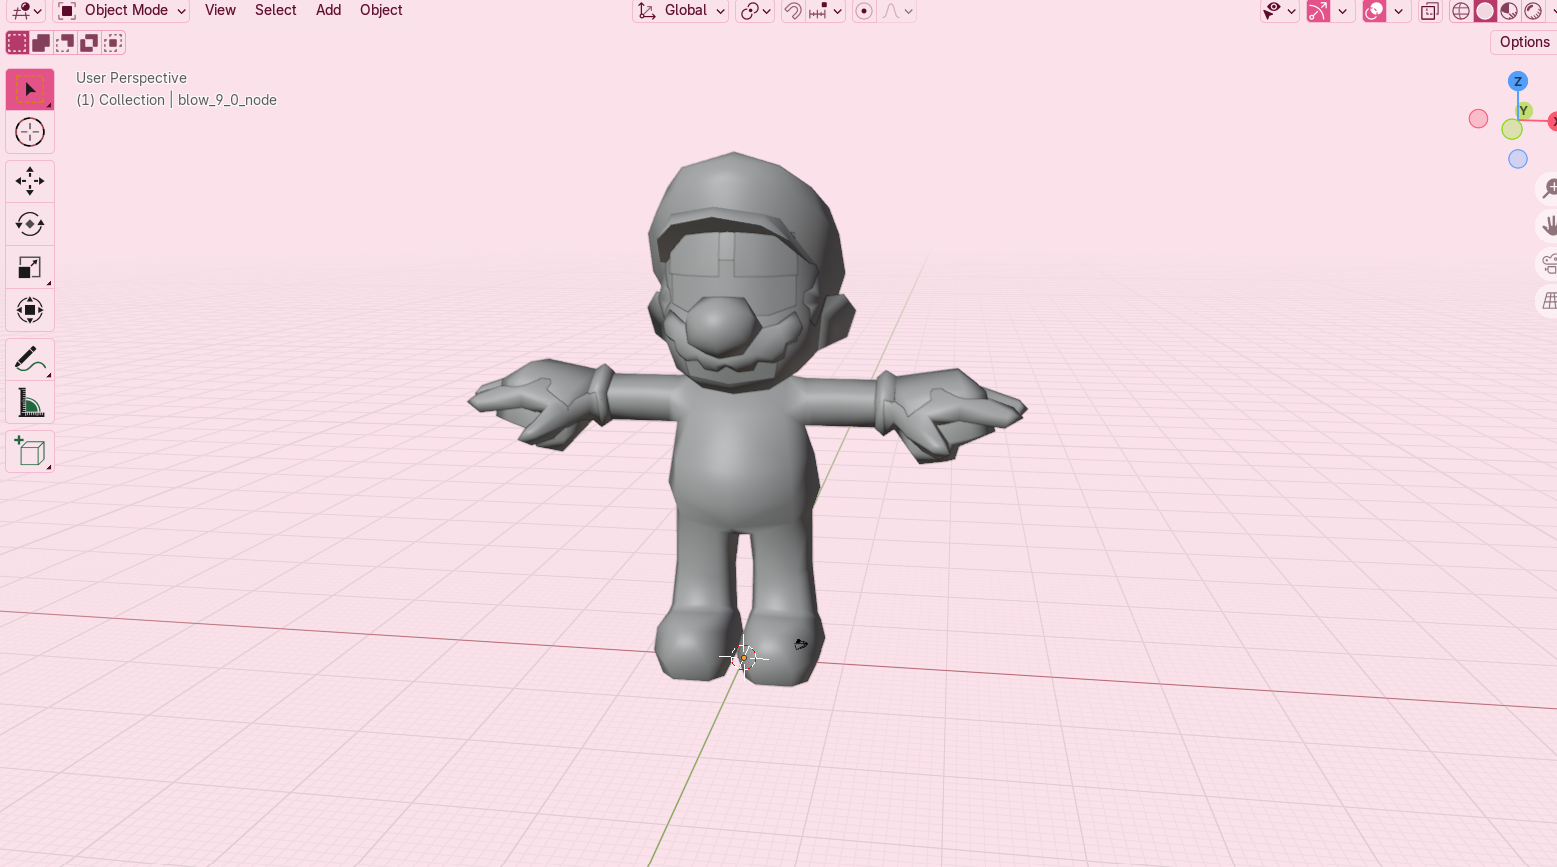 To scale it down, first make sure to hide your camera and light by selecting them and hitting the 'H' key.
Now, select all of your model with the 'A' key, then hit the 'S' key. Now, just type '.1' then hit enter, this will scale it down to a much easier size to work with :)
To scale it down, first make sure to hide your camera and light by selecting them and hitting the 'H' key.
Now, select all of your model with the 'A' key, then hit the 'S' key. Now, just type '.1' then hit enter, this will scale it down to a much easier size to work with :)
Okay! Now that we've scaled it down, let's get into the meat of things!
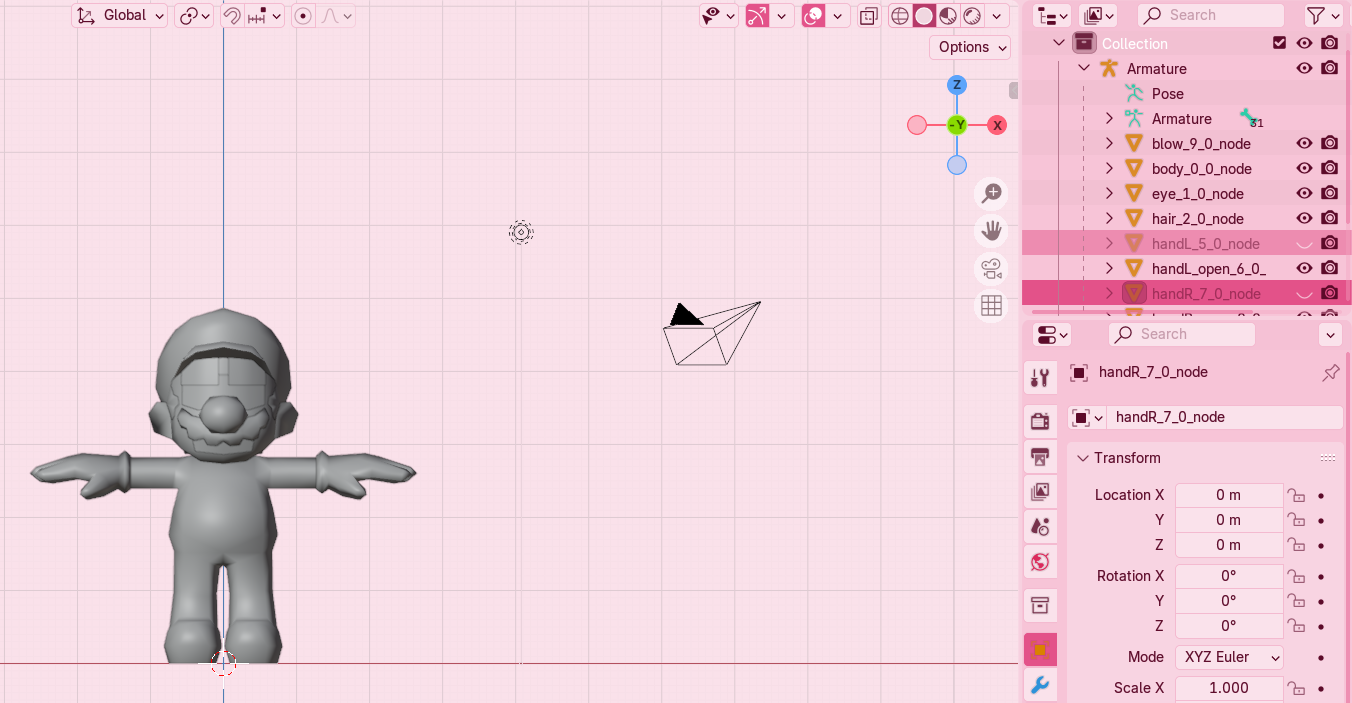
Hiding Extra Objects
Whether you're following this tutorial or have your own model, it likely has extra objects intersecting with everything. In this case, it's Mario's hands.
He has an extra pair of fists that come with his model, but we don't want to use those. But we also don't want to straight up delete them in case, we may want them later!
To solve this issue, just select the objects you want hidden, in this case Mario's fists, and then hit the 'H' key!

 If you ever want those objects, you can either hit 'Alt + H' (though, beware this will unhide every hidden object), or you can look to the outliner
and click the closed eyeball to unhide the object :)
If you ever want those objects, you can either hit 'Alt + H' (though, beware this will unhide every hidden object), or you can look to the outliner
and click the closed eyeball to unhide the object :)
Viewing the Texture
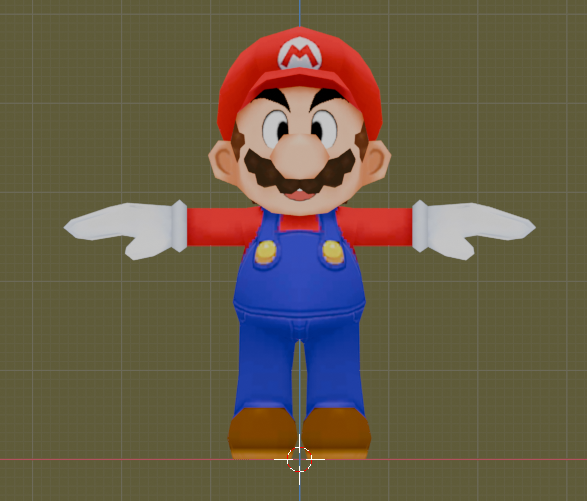
Locate the Viewport Shading.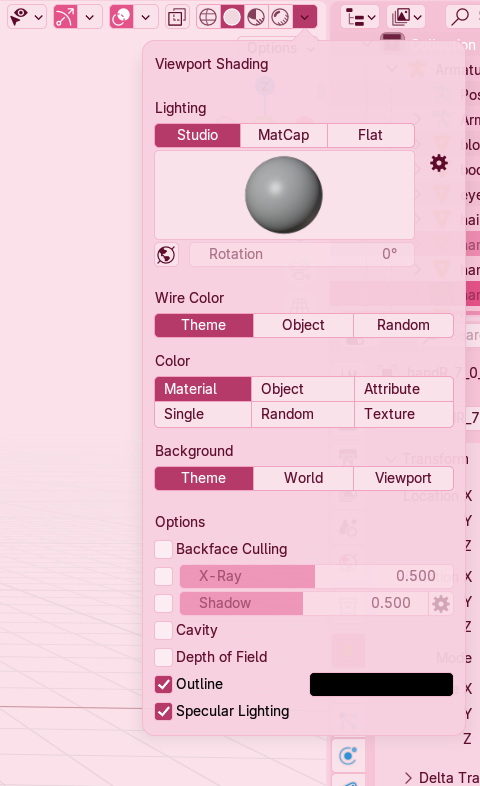 Now, you can either switch into 'Solid' view and just render from the viewport when done with this tutorial, or you can render it normally in Rendered view.
If going down the 'Solid' view viewport render route, just click 'Flat' under Lighting and 'Texture' under Color. Now, Mario should look normal and colorful! If you don't want to
or care about fixing the broken transparent images, there's ,a section on how to render the model just like this!
Now, you can either switch into 'Solid' view and just render from the viewport when done with this tutorial, or you can render it normally in Rendered view.
If going down the 'Solid' view viewport render route, just click 'Flat' under Lighting and 'Texture' under Color. Now, Mario should look normal and colorful! If you don't want to
or care about fixing the broken transparent images, there's ,a section on how to render the model just like this!

 Though, if you'd like to render everything normally, just click on 'Rendered' view, you will immediately notice, Mario's face is now very off with his transparent eyes, brows and mouth now
paired with black backgrounds, we will now fix this :)
Though, if you'd like to render everything normally, just click on 'Rendered' view, you will immediately notice, Mario's face is now very off with his transparent eyes, brows and mouth now
paired with black backgrounds, we will now fix this :)

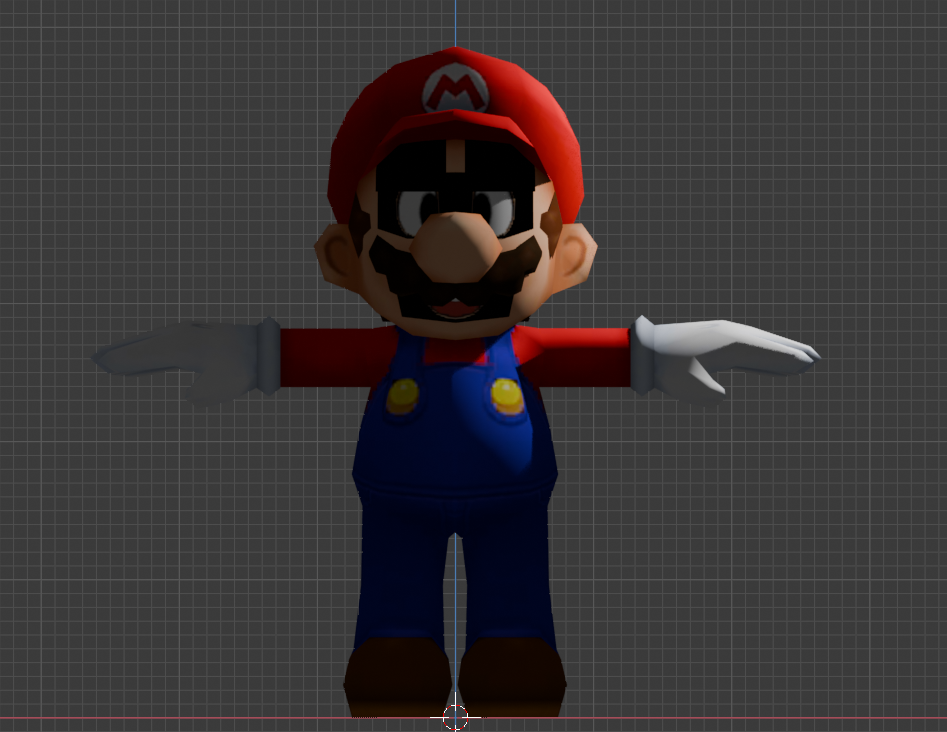
Solving the Black Background Issue on Transparent Textures
I don't know why Blender does this, but I can fix it!
Head into the 'Shading' Tab and select the object you want to fix! In this case, we'll first be fixing Mario's brows!
 Look down at the nodes, this is the default set-up Blender has for this model, but unfortunately it doesn't pick up on the transparency.
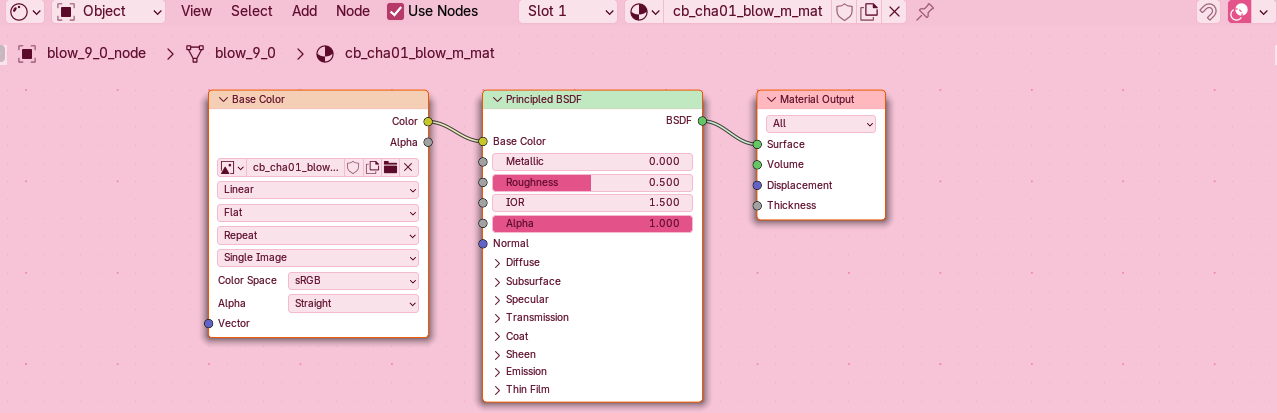 To fix this, delete the 'Principled BSDF' node. Now, hit 'Shift + A' and type and enter in the following shaders (or just click 'Add' then hit Shaders), and add three shaders to the group. You are adding:
Mix Shader
Emission
Transparent BSDF
With these in your group, take the yellow 'Color' output for your image texture (Base Color) and connect it to the yellow 'Color' input of the 'Emission' node.
Take the grey 'Alpha' output from your image texture and connect it to the grey 'Fac' input of the 'Mix Shader' node.
Now take the green 'BSDF' input node from your 'Transparent' shader and connect it to the one of the green 'Shader' outputs of the 'Mix Shader' node. Now
take the green 'Emission' input node from your 'Emission node' and connect it to the other green 'Shader' output node of the 'Mix Shader' node. Finally, just connect the green 'Shader'
input node from the 'Mix Shader' and connect it to the 'Surface' output node of the 'Material Output' node! Congratulations, the brows are now transparent!!
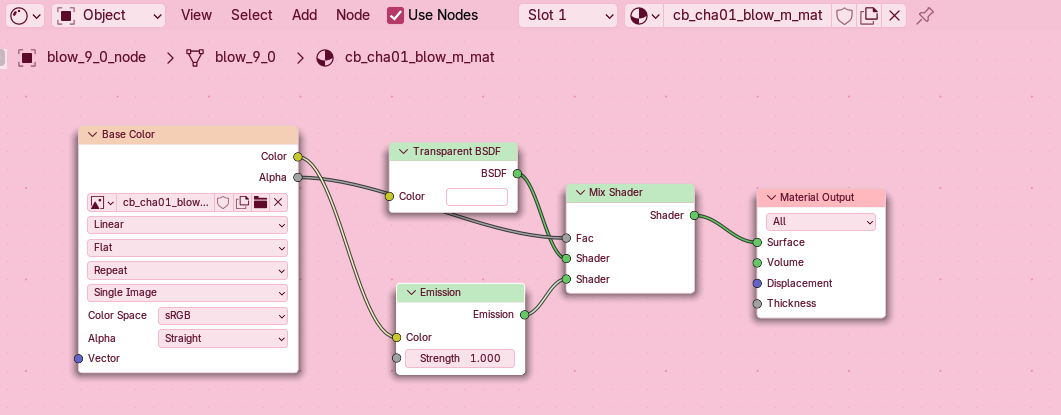
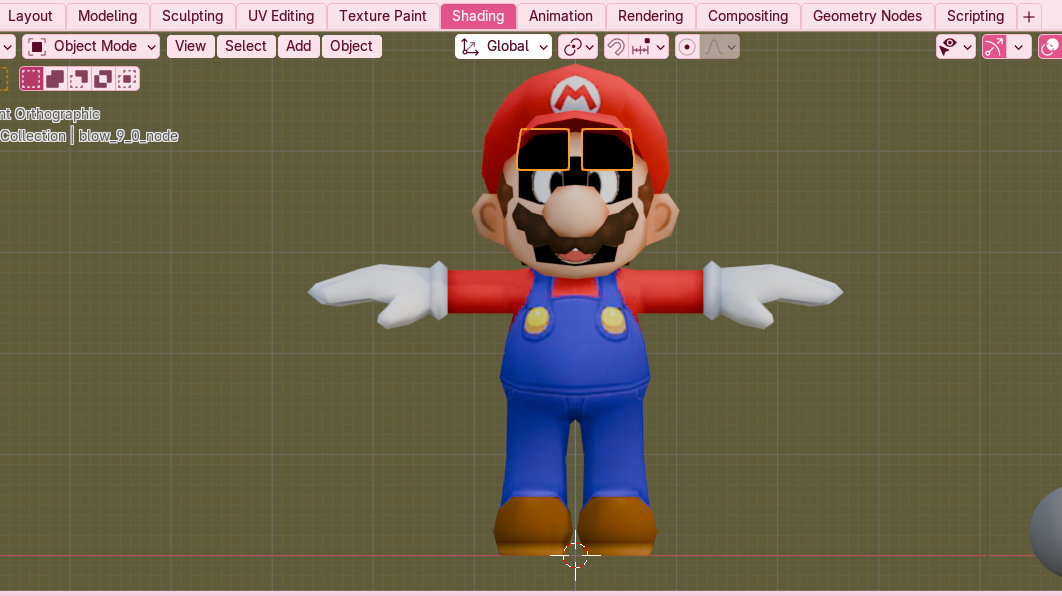
Now, simply repeat this exact node setup for every other object that needs it! In this case, for the tutorial, just do the exact steps for his eyes and mouth!
Mario should now look normal!!
Odd Rendered View Lighting
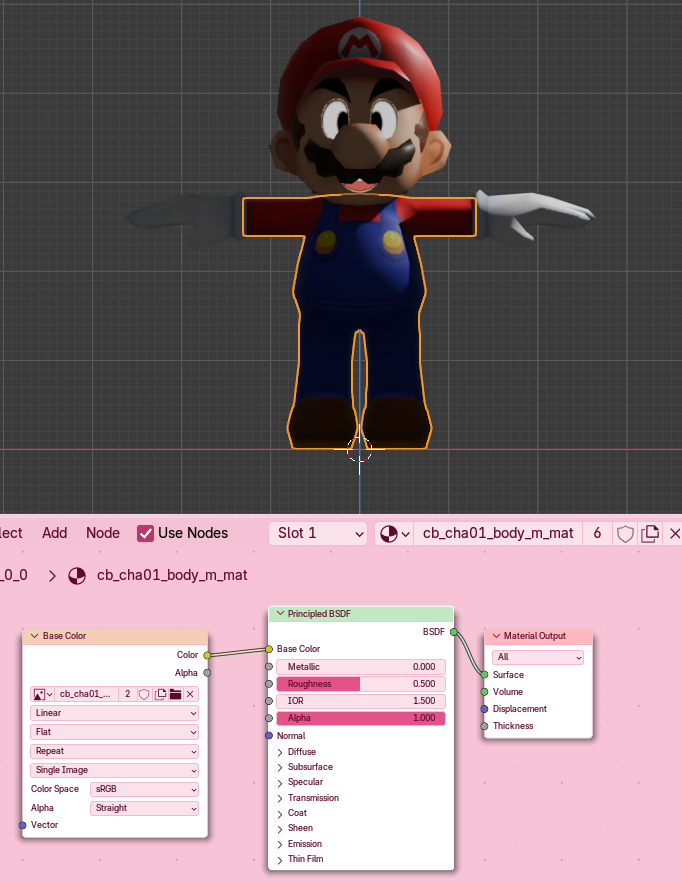
Though, unfortunately, if you head back to 'Rendered view', there are still some things that are off, namely his body, hat and head.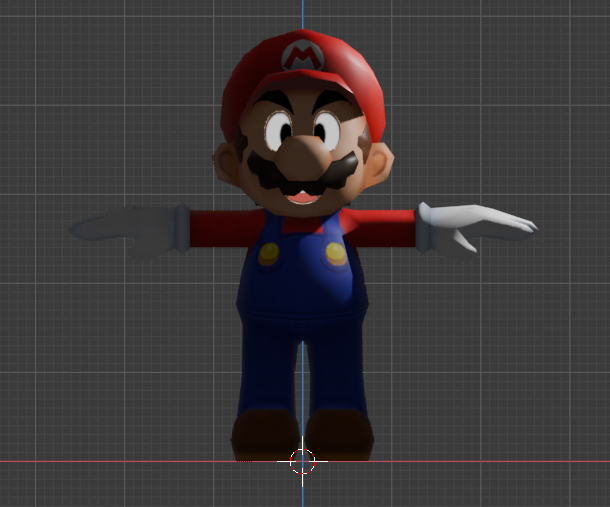 This is easily fixable though! Just click on the on the object you want to fix, then look at the nodes.
For this tutorial, click on his body first. Here's what it should look like.
This is easily fixable though! Just click on the on the object you want to fix, then look at the nodes.
For this tutorial, click on his body first. Here's what it should look like.
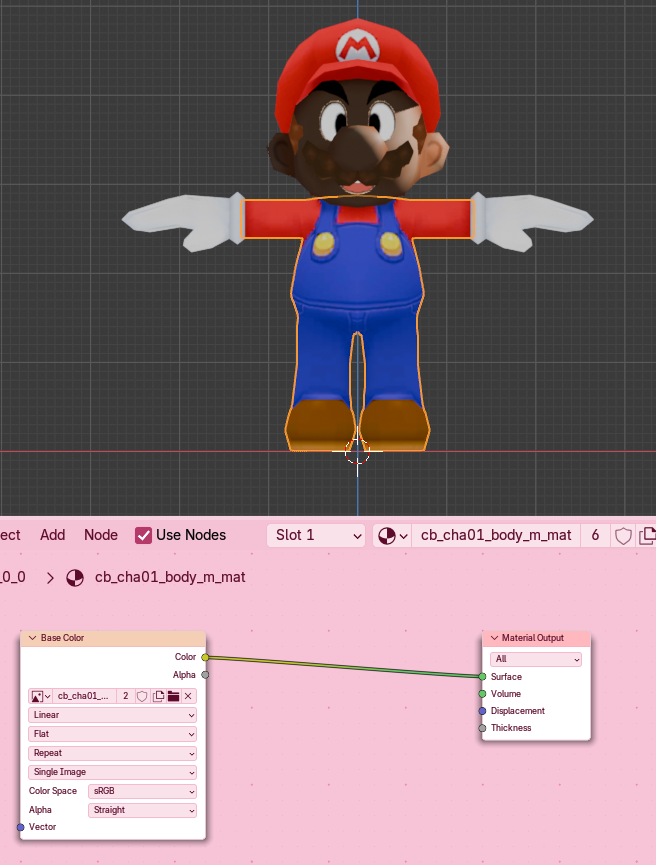
 Now, just delete the 'Principled BSDF' and connect the 'Color' of your image texture directly into the 'Surface' of the 'Material Output.' congratualations again, it's now fixed!
 Now, just do the same thing for every other object that needs it! By then, Mario should look perfectly normal in Rendered view!!
Sometimes an object may have multiple materials! You will need to repeat this method for every material if you want this flat shaded look!
Now, just do the same thing for every other object that needs it! By then, Mario should look perfectly normal in Rendered view!!
Sometimes an object may have multiple materials! You will need to repeat this method for every material if you want this flat shaded look!
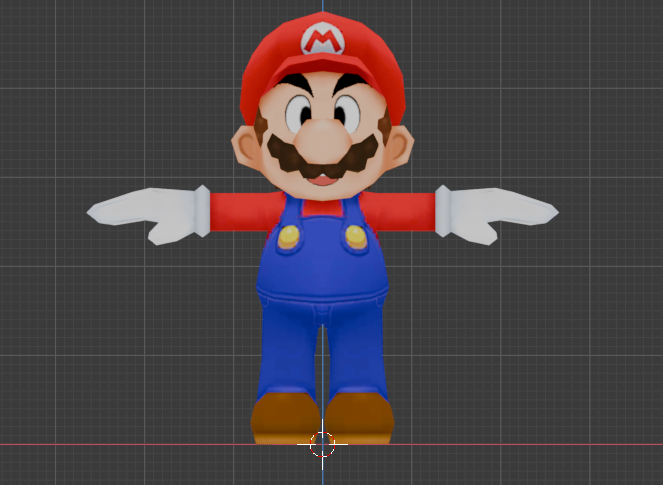 Okay!! Now your model is ready to do anything you want! This Mario model is already rigged, so if you want you can just head into the Animation tab
and animate away!! Have fun!! I really hope this helped!!
Okay!! Now your model is ready to do anything you want! This Mario model is already rigged, so if you want you can just head into the Animation tab
and animate away!! Have fun!! I really hope this helped!!
Extra Helpful Things
Just extra info someone may need!
How to Render Transparency
If you made a cute small animation similiar to the one below and want to render it transparently, just go to your Properties tab and click Render. Under 'Film', check Transparent! Now, it will render transparently!! Yay!!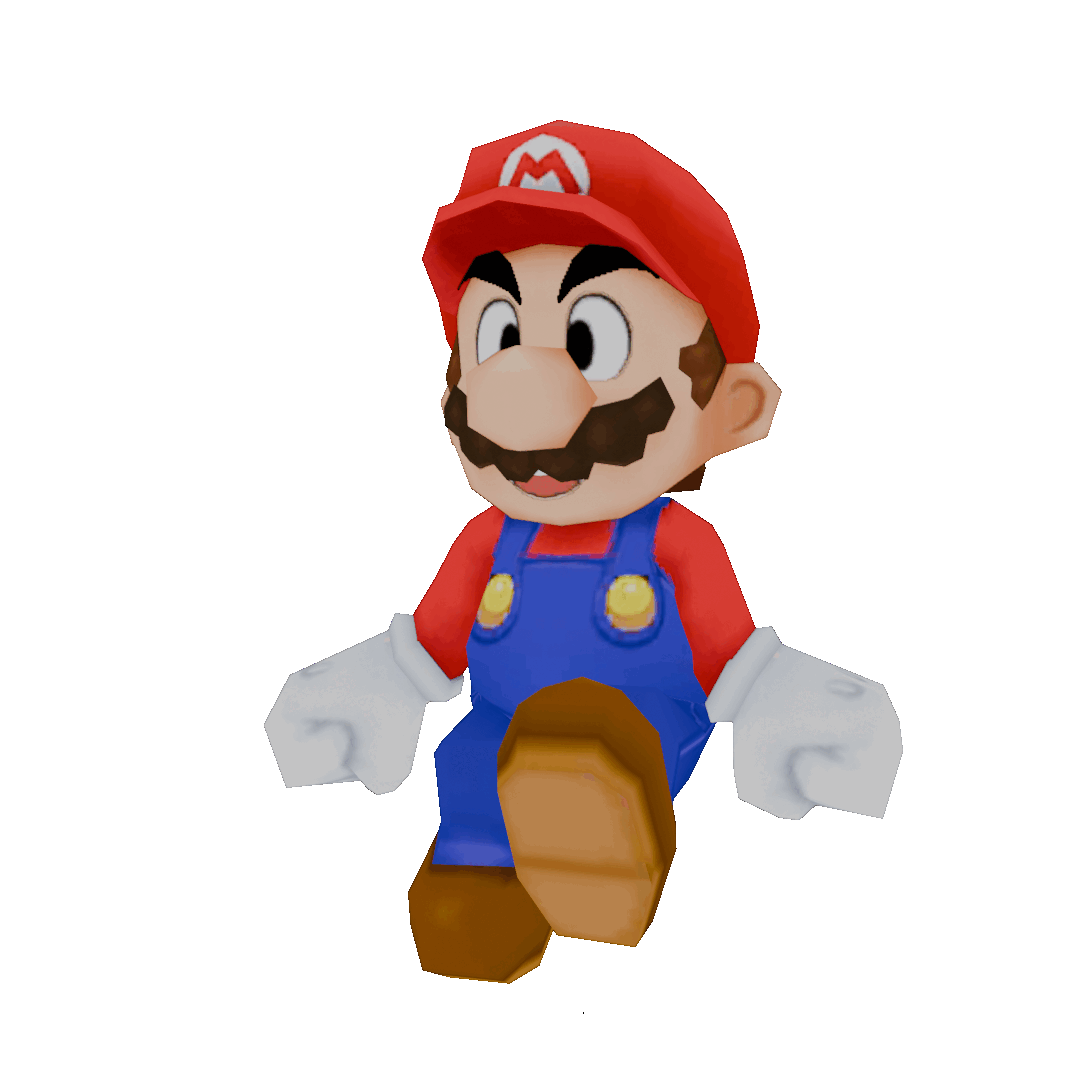
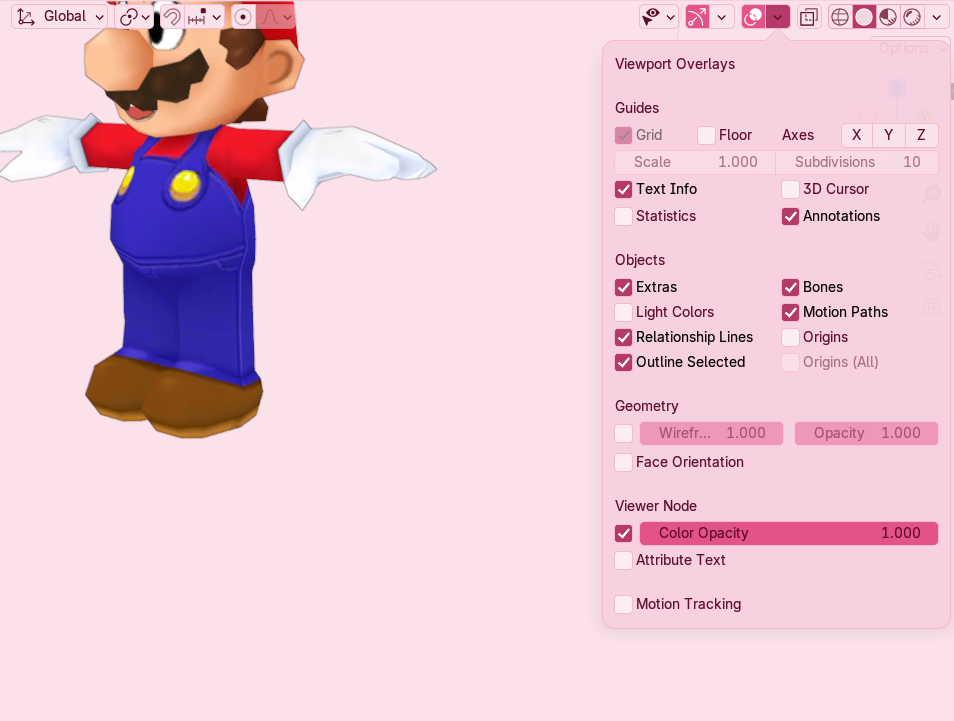
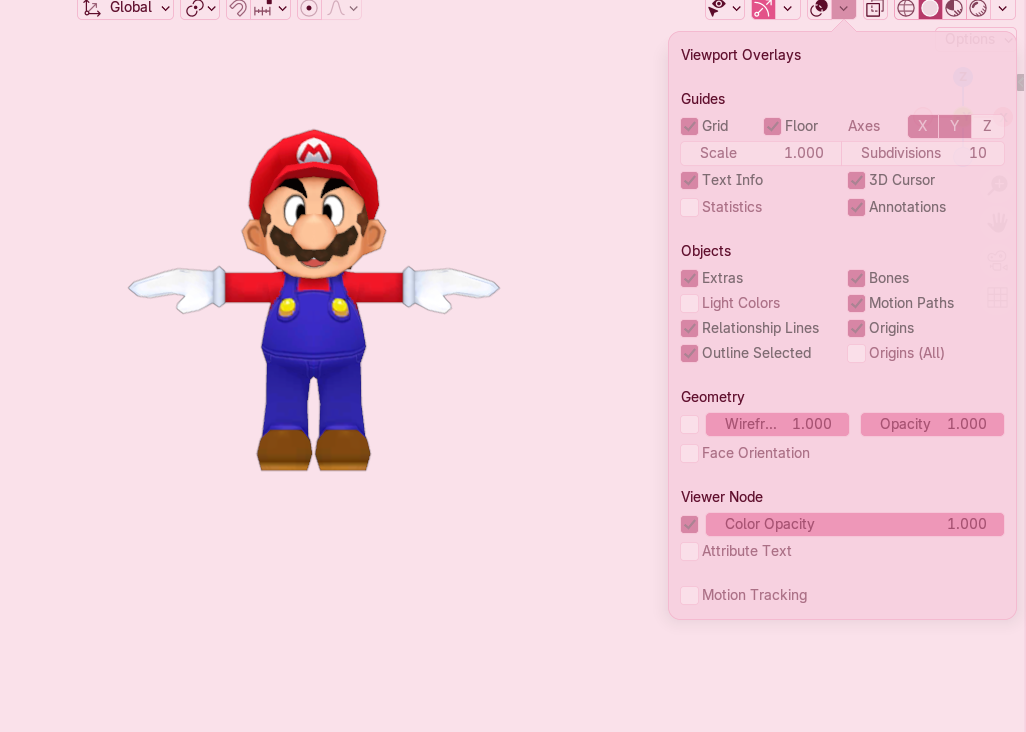
Render Straight from the 'Solid' Viewport
If you don't want to do any of the Node stuff and would just like to Render exactly as it looks in 'Solid View', here's how!Make sure you are in 'Solid' View, then navigate to 'Viewport Overlays'.
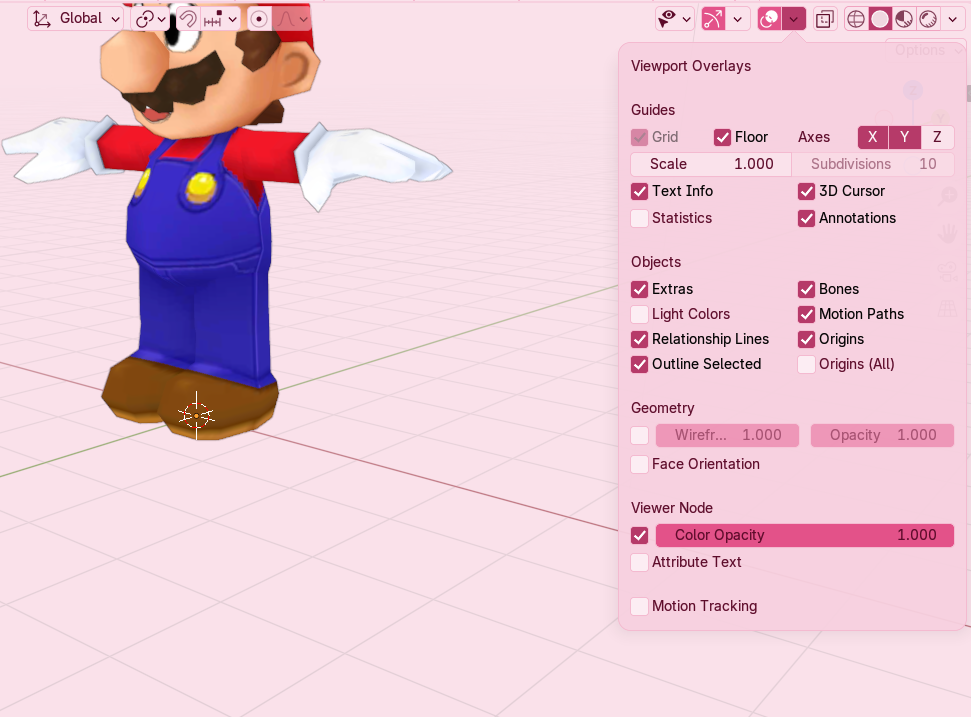 In here, you can either click on the icon itself to automatically hide everything besides the model or uncheck the necessary Guides and Objects you don't want in your render, whichever you prefer. Either way,
your viewport should now be empty of everything besides your model.
In here, you can either click on the icon itself to automatically hide everything besides the model or uncheck the necessary Guides and Objects you don't want in your render, whichever you prefer. Either way,
your viewport should now be empty of everything besides your model.
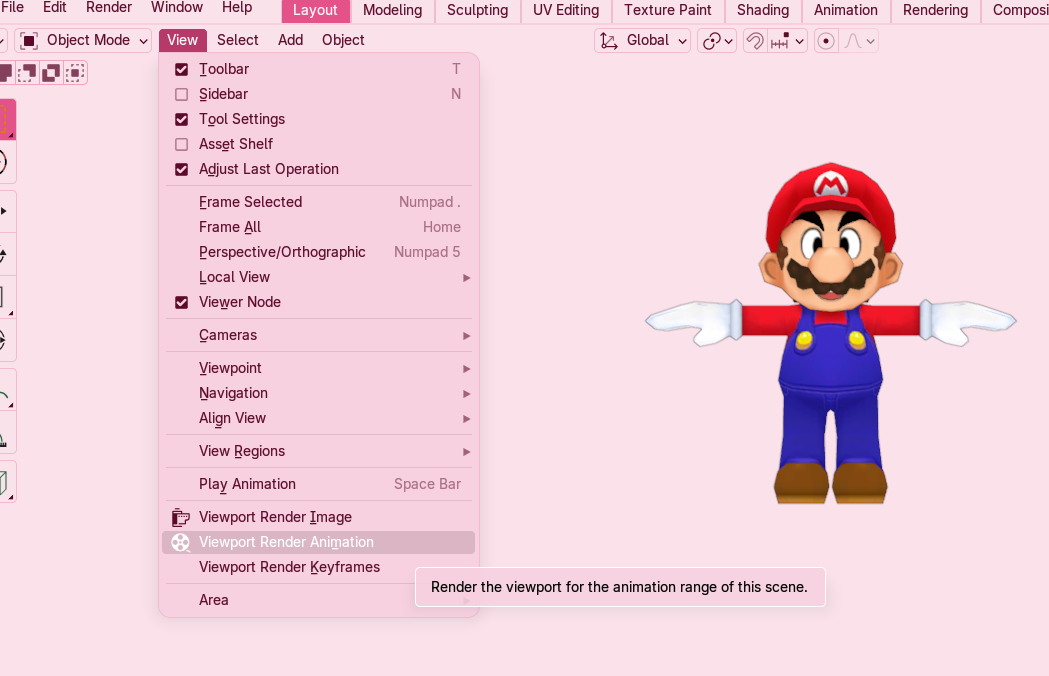
 Now, just navigate to View and hit Viewport Render Animation or whichever you want. From there, just follow how you would normally render anything!!
I hope this helps anyone who may need it!! If necessary, I'll add more information where need be and any other tips I come across!! Happy modeling!! :3